
 That sums up my opinions on turbochargers hahahahaha
- Welcome to BigMike's Forum.
This section allows you to view all posts made by this member. Note that you can only see posts made in areas you currently have access to.
#1
Chit Chat / Re: VIDEO WAR!!
January 25, 2017, 02:16:04 PM That sums up my opinions on turbochargers hahahahaha
#2
Projects and Build-Ups / Re: The Rebirth
November 18, 2016, 03:54:32 PM
Man I need to get this thread updated... 
#3
Projects and Build-Ups / Re: The Rebirth
March 17, 2016, 12:21:56 PM
I already straightened and fixed that thing (see reply #399) and now it's back hanging off the dash. It is so wore out that it has permanently deformed into the falling-off-the-dash position. I once ordered a new blue dash mat from eBay and I received it and the stupid thing 1) wasn't cut for the glove box (so the entire mat would be ripped up every time the glove box is accessed) and 2) it did not come up and over the sides of the instrument panel nor the bottom leading edges of both side vents. It was a real pile of crap.
Need to look around for a better one eventually...
Ok I finally got screen shots of the e-Manage software in action but I am going to have a busy next 8 days preparing for our next track event (March 26 @ Springs of Willow Raceway, Palmdale, CA) so might be a bit until I get post up some more.
Regards,
BigMike
#4
Projects and Build-Ups / Re: The Rebirth
March 16, 2016, 10:02:08 PMQuote from: Colston on March 15, 2016, 02:32:18 PM
and what is where your dash should be?
Whoops, forgot to ask about this. What do you mean?
#5
Projects and Build-Ups / Re: The Rebirth
March 16, 2016, 07:06:07 AMQuote from: Colston on March 15, 2016, 02:32:18 PMHey Colston,
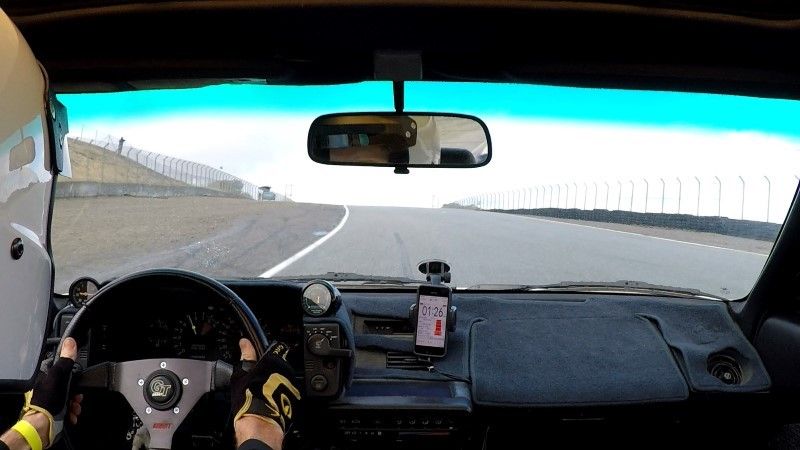
Did you blow by an S2K in your video? and what is where your dash should be?
Yes that was a S2000 but it was a designated passing zone so he was letting us pass. That said, slower cars (like S2K) are required to allow faster ones (like GZE AW11) to pass
")
#6
Projects and Build-Ups / Re: The Rebirth
March 13, 2016, 09:29:42 PM
1. Configuring the e-Manage
The instructions that comes with the e-Manage left a lot to be desired. Some diagrams are very hard to read, others have missing data all together. One thing to note straightaway is that I am using the e-Manage Blue, which is an obsolete version now superseded by the e-Manage Ultimate. I don't have any experience with the Ultimate, but here are differences between the two from what I've gathered from research:
Advantages of the e-Manage Ultimate:
Advantages of the e-Manage Blue:
What they both can do:
I got my e-Manage Blue from Bill, and I LOVE IT. The best thing is that on the US 4A-GZE, the Blue can both retard AND advance ignition timing! Apparently this isn't the case for most engines so we are fortunate to have full ignition timing control.
Prelude:
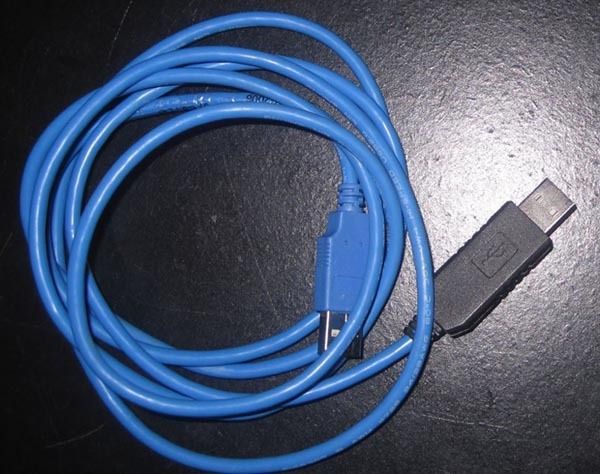
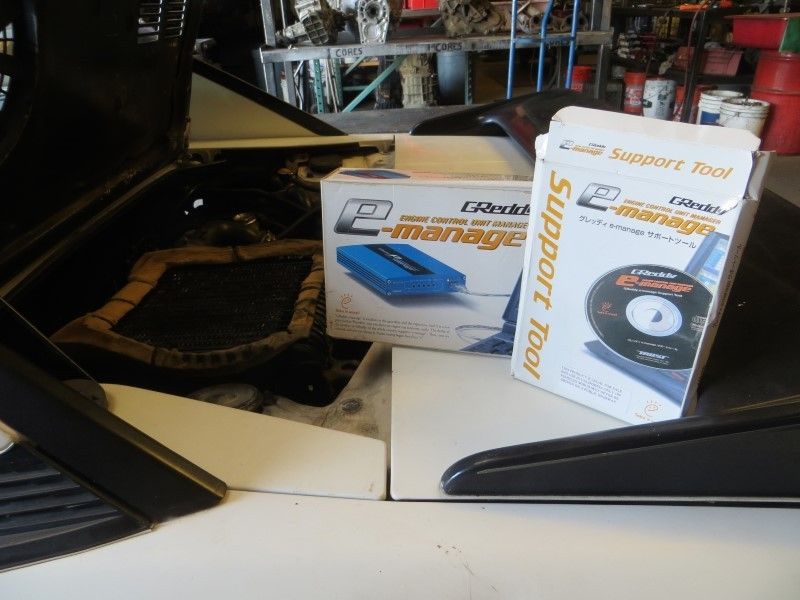
Before I go ANY further, I must tell you that you will want to be able to connect a Laptop/computer to your e-Manage the moment you get it installed. The reason is because as the Blue unit is discontinued, it's highly unlikely you'll find a unit with out any modifications pre-programmed to it. What if it is set for 50% more airflow at an idle? It might not even start up despite being wired correctly. And now I must share with you a very annoying feature of the eM Blue: The "USB" port is NOT a Universal Serial Bus. It is a SERIAL port using a USB connection!!!! What's worse is that Greddy is using some old or proprietary protocol in an attempt to control the market on laptop integration. Greddy will have you buy their "official" "Support Tool" which includes their "special" cable (see first pic of reply #445 above -- mine came with the cable missing). BUT, there are ways around this which I will share now.
For starters, you could just buy any ordinary serial cable, such as this $3 one on Amazon, cut one end off and soder on a USB male cable end from some old USB cable you have laying around......and then connect that to your 1990s laptop. But, at this point, I really hope you are not using a 1990s laptop or any other laptop that has a serial port! So unless you are reading this via your Windows 98 SE operating system, you could try making one yourself using a RS232 to TTL converter following the directions of this nice website. This is the cheapest (modern) option but I chose to get a premade USB to fake-USB cable from eBay, and this is what I did for $50: http://www.ebay.com/itm/291690440248 If for any reason you cannot find it on eBay or the link is dead, then here is the guy who makes them, http://www.ebay.com/usr/talon1luv, send him a message if you can't find it in his listings.
I highly recommend you get this cable right away because here is what happened to me: I was like 'No Big Deal' I'll just pick up a serial-to-USB conversion cable from Radio $hack (it was $39!!), installed the e-Manage, then realized there is some fancy protocol that prevents most all modern serial-to-USB cables from working, and returned the pile of crap cable. I then drove around for about two weeks with the e-Manage disconnected while researching what to do before I actually got a cable that worked!!
So I had the e-Manage installed yet I couldn't use it. Don't let this happen to you! Yes, there are some rotary dials on the front panel to alter AFM voltages at a few set RPM points, but....trust me, if you are not datalogging (much, much more on this later!) then I wouldn't even bother using an e-Manage. Seriously.
So without anymore sidetracking, let's get on with the install for the USDM (1988-1989 airflow meter and distributor 8.0:1 compression) 4A-GZE:
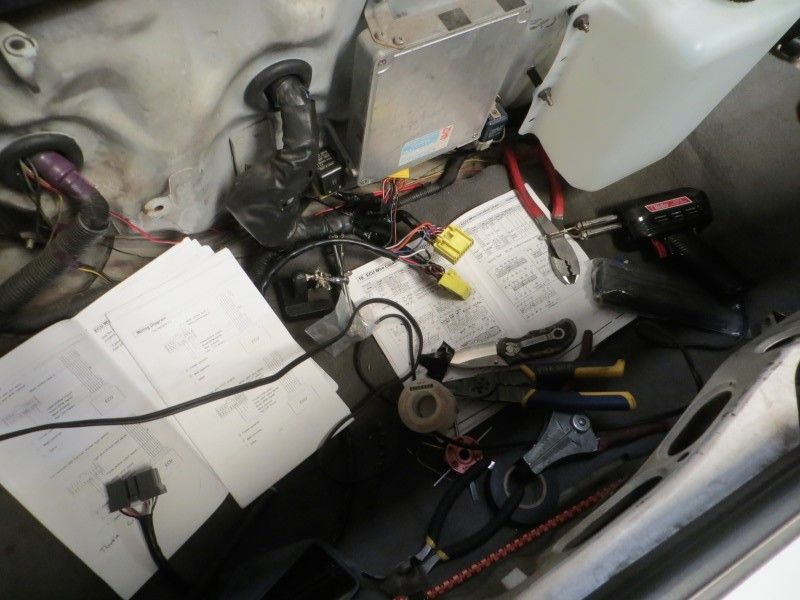
Installing:
Installing was pretty straight-forward. I have uploaded the Installation Manual to my server here:
http://bigmike.marlincrawler.com/files/1987_MR2/electrical/e-manage/e-manage-blue-installation-manual.pdf (PDF, 2.36MB)
Here we go! Let's do this in 3 Easy Steps
Step 1:
First open the PDF to pages 15 & 16. Unscrew the e-Manage and pull out the circuit board. Set the jumpers to the following:
JP1 1-2
JP2 1-2
JP3 1-2
JP4 empty
JP5 empty
JP6 empty
JP7 1-2
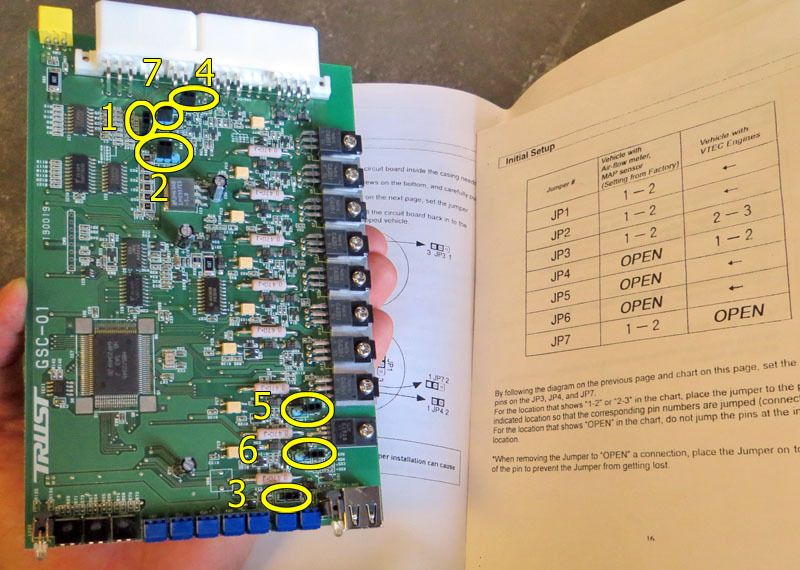
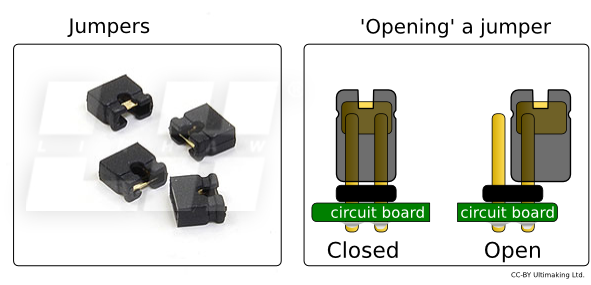
If you don't want to lose the jumpers at 4, 5, and 6 you can just hang them on one post off to the side so that they aren't touching any other post, like this:
Step 2:
Next rotate the board around to the end with the blue dials and flip to page 14. Configure the dials as follows (via info from page 27):
1: Position "2"
2: Position "4"
3: Position "A"
4: Not used, so point it straight up.
5: Not used, so point it straight up.
Then put the circuit board back inside the housing.
Step 3:
Next go to page 9. The top diagram is what our USDM 4A-GZE will use since we have a "flap type" air flow meter.
It is painfully easy. You only need to splice one wire, the AFM signal wire, and then connect power, ground, and RPM. The only thing to be careful with here is with the Airflow splice: The Green wire goes to the ECU, and the White wire goes to the Engine. Don't get that backwards!
Now, something VERY important here is that Greddy leftout the wiring for the Throttle! It is a Gray wire and will be needed if you want to base any adjustments by Throttle Percent, which does make sense as our positive-displacement boost is linear with throttle position.....but more on this later.
Flip to page 27 for our ECU pin layout, T-5, and you can see Th is listed for Throttle, which I'd recommend connecting. Colored for reference:
and here is a pin-out for reference just in case it's needed:
So that's it, 4 connections and 1 splice and you're up and running! Turn your key to the on position and you should get a blinking orange light at the e-Manage. At this point, as mentioned above, it would be great to connect the e-Manage to your computer before firing up your engine for the first time. So go ahead and plug your special designed-for-the-e-Manage-serial-to-USB cable to your computer now and launch the following software:
http://bigmike.marlincrawler.com/files/1987_MR2/electrical/e-manage/e-manage-blue-software.zip (5.53MB)
I've included the final update to the e-Manage Blue Software which will take the software from v1.40 up to v1.49, the final Greddy 2006 update which is required in order to run a MAP sensor without having to use some rainbow table to manually convert between AFM and MAP voltages (run "e-manage149 - update.exe" after installing the program).
If needed, here is the older PL2303 v3.3.2.105 Prolific cable driver that is old enough to work with the e-Manage Blue. This driver works with the cable via the eBay link above:
http://bigmike.marlincrawler.com/files/1987_MR2/electrical/e-manage/e-manage-usb-cable-prolific-PL2303-v3.3.2.105.zip (2.15 MB)
I've also included install instructions in the Prolific archive file (see step 1 below).
2. Get the software up and running
1. Get the Greddy Software installed and configured to use the same Com port as your cable, then close the program (see my install notes in the file '! Install - PL2303 v3.3.2.105 Old and compatible.txt').
2. Turn your ignition to the ON position to power up the e-Manage.
3. Plug the cable into your laptop, and finally
4. Launch the Greddy Software (again)
Okay now we'll move on to the actual software. Plenty more to come hopefully soon. I need to get out to my car to get various software screen shots to explain the next steps!
Regards,
BigMike
The instructions that comes with the e-Manage left a lot to be desired. Some diagrams are very hard to read, others have missing data all together. One thing to note straightaway is that I am using the e-Manage Blue, which is an obsolete version now superseded by the e-Manage Ultimate. I don't have any experience with the Ultimate, but here are differences between the two from what I've gathered from research:
Advantages of the e-Manage Ultimate:
| e-Manage Ultimate | e-Manage Blue (what I've got) |
| Fully control injectors, both scaling and pulsewidth | Can only add fuel |
| Two step RPM launch control | No launch control |
| Can replace AFM with a single MAP sensor | Cannot work without factory airflow meter |
| Full ignition timing control via aftermarket crank sensors | Can retard timing on most, but only advance timing on some |
| Multiple inputs for optional devices (AFR, MAP, EGR, Knock) | Only one input for one optional device |
| Data logging without laptop | Requires constant cable connection to datalog, and can only datalog for about five minutes at a time |
| Supported, free updates, tons of community help | No longer supported, hard to find help |
| Can be purchased new | You'll most likely find it used with an unknown prior configuration |
| Modern software with good export capability | Software was last updated in 2006. Only exports to a proprietary Greddy format (more on this later) |
| Uses a standard USB cable | Does not use a standard USB cable (more on this below) |
Advantages of the e-Manage Blue:
| e-Manage Blue | e-Manage Ultimate |
| Costs less | Costs more |
| Compatible with the Greddy Profec E01! (Example video) | Not compatible |
What they both can do:
| e-Manage Ultimate | e-Manage Blue |
| Extend Rev limit | Can do this with additional external control module |
| Adjust AFM voltage | Adjust AFM voltage |
I got my e-Manage Blue from Bill, and I LOVE IT. The best thing is that on the US 4A-GZE, the Blue can both retard AND advance ignition timing! Apparently this isn't the case for most engines so we are fortunate to have full ignition timing control.
Prelude:
Before I go ANY further, I must tell you that you will want to be able to connect a Laptop/computer to your e-Manage the moment you get it installed. The reason is because as the Blue unit is discontinued, it's highly unlikely you'll find a unit with out any modifications pre-programmed to it. What if it is set for 50% more airflow at an idle? It might not even start up despite being wired correctly. And now I must share with you a very annoying feature of the eM Blue: The "USB" port is NOT a Universal Serial Bus. It is a SERIAL port using a USB connection!!!! What's worse is that Greddy is using some old or proprietary protocol in an attempt to control the market on laptop integration. Greddy will have you buy their "official" "Support Tool" which includes their "special" cable (see first pic of reply #445 above -- mine came with the cable missing). BUT, there are ways around this which I will share now.
For starters, you could just buy any ordinary serial cable, such as this $3 one on Amazon, cut one end off and soder on a USB male cable end from some old USB cable you have laying around......and then connect that to your 1990s laptop. But, at this point, I really hope you are not using a 1990s laptop or any other laptop that has a serial port! So unless you are reading this via your Windows 98 SE operating system, you could try making one yourself using a RS232 to TTL converter following the directions of this nice website. This is the cheapest (modern) option but I chose to get a premade USB to fake-USB cable from eBay, and this is what I did for $50: http://www.ebay.com/itm/291690440248 If for any reason you cannot find it on eBay or the link is dead, then here is the guy who makes them, http://www.ebay.com/usr/talon1luv, send him a message if you can't find it in his listings.
I highly recommend you get this cable right away because here is what happened to me: I was like 'No Big Deal' I'll just pick up a serial-to-USB conversion cable from Radio $hack (it was $39!!), installed the e-Manage, then realized there is some fancy protocol that prevents most all modern serial-to-USB cables from working, and returned the pile of crap cable. I then drove around for about two weeks with the e-Manage disconnected while researching what to do before I actually got a cable that worked!!
So I had the e-Manage installed yet I couldn't use it. Don't let this happen to you! Yes, there are some rotary dials on the front panel to alter AFM voltages at a few set RPM points, but....trust me, if you are not datalogging (much, much more on this later!) then I wouldn't even bother using an e-Manage. Seriously.
So without anymore sidetracking, let's get on with the install for the USDM (1988-1989 airflow meter and distributor 8.0:1 compression) 4A-GZE:
Installing:
Installing was pretty straight-forward. I have uploaded the Installation Manual to my server here:
http://bigmike.marlincrawler.com/files/1987_MR2/electrical/e-manage/e-manage-blue-installation-manual.pdf (PDF, 2.36MB)
Here we go! Let's do this in 3 Easy Steps
Step 1:
First open the PDF to pages 15 & 16. Unscrew the e-Manage and pull out the circuit board. Set the jumpers to the following:
JP1 1-2
JP2 1-2
JP3 1-2
JP4 empty
JP5 empty
JP6 empty
JP7 1-2
If you don't want to lose the jumpers at 4, 5, and 6 you can just hang them on one post off to the side so that they aren't touching any other post, like this:
Step 2:
Next rotate the board around to the end with the blue dials and flip to page 14. Configure the dials as follows (via info from page 27):
1: Position "2"
2: Position "4"
3: Position "A"
4: Not used, so point it straight up.
5: Not used, so point it straight up.
Then put the circuit board back inside the housing.
Step 3:
Next go to page 9. The top diagram is what our USDM 4A-GZE will use since we have a "flap type" air flow meter.
It is painfully easy. You only need to splice one wire, the AFM signal wire, and then connect power, ground, and RPM. The only thing to be careful with here is with the Airflow splice: The Green wire goes to the ECU, and the White wire goes to the Engine. Don't get that backwards!
Now, something VERY important here is that Greddy leftout the wiring for the Throttle! It is a Gray wire and will be needed if you want to base any adjustments by Throttle Percent, which does make sense as our positive-displacement boost is linear with throttle position.....but more on this later.
Flip to page 27 for our ECU pin layout, T-5, and you can see Th is listed for Throttle, which I'd recommend connecting. Colored for reference:
and here is a pin-out for reference just in case it's needed:
So that's it, 4 connections and 1 splice and you're up and running! Turn your key to the on position and you should get a blinking orange light at the e-Manage. At this point, as mentioned above, it would be great to connect the e-Manage to your computer before firing up your engine for the first time. So go ahead and plug your special designed-for-the-e-Manage-serial-to-USB cable to your computer now and launch the following software:
http://bigmike.marlincrawler.com/files/1987_MR2/electrical/e-manage/e-manage-blue-software.zip (5.53MB)
I've included the final update to the e-Manage Blue Software which will take the software from v1.40 up to v1.49, the final Greddy 2006 update which is required in order to run a MAP sensor without having to use some rainbow table to manually convert between AFM and MAP voltages (run "e-manage149 - update.exe" after installing the program).
If needed, here is the older PL2303 v3.3.2.105 Prolific cable driver that is old enough to work with the e-Manage Blue. This driver works with the cable via the eBay link above:
http://bigmike.marlincrawler.com/files/1987_MR2/electrical/e-manage/e-manage-usb-cable-prolific-PL2303-v3.3.2.105.zip (2.15 MB)
I've also included install instructions in the Prolific archive file (see step 1 below).
2. Get the software up and running
1. Get the Greddy Software installed and configured to use the same Com port as your cable, then close the program (see my install notes in the file '! Install - PL2303 v3.3.2.105 Old and compatible.txt').
2. Turn your ignition to the ON position to power up the e-Manage.
3. Plug the cable into your laptop, and finally
4. Launch the Greddy Software (again)
Okay now we'll move on to the actual software. Plenty more to come hopefully soon. I need to get out to my car to get various software screen shots to explain the next steps!
Regards,
BigMike
#7
Projects and Build-Ups / Re: The Rebirth
March 13, 2016, 05:40:52 PM
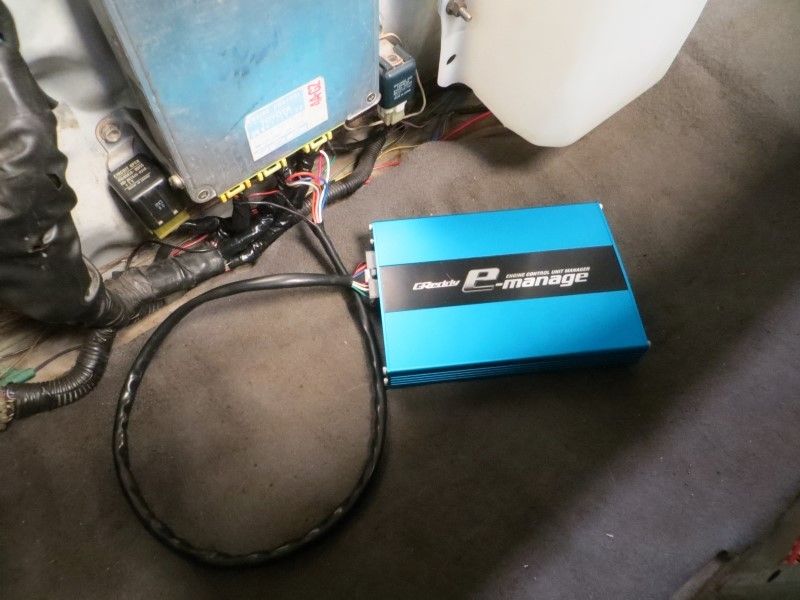
Greddy e-Manage Blue
Ok guys, let me tell you something, the e-Manage IS THE REAL DEAL.
With the USDM GZE, we can add fuel, add ignition timing, and remove ignition timing. We can modify the AFM voltage (however it's not recommended as this will also alter timing), and we can enter flow rates for oversized injectors and the e-Manage Blue (EMB) will automatically calculate the % difference for an adjusted AFM output signal (so the ECU sees the proper AFM signal as if we had stock injectors, yet we can add fuel on top since we've got larger injectors). This is everything needed to get the GZE running great on high boost and provides many tools for a great dyno tune.
A LOT has happened with my learning and progression of the EMB since September 7 so this is difficult to even start these next replies.
So I'm going to break this up into sections so I can organize all the progress with this major step in my car's development.
1. Configuring the e-Manage
2. Get the software up and running
3. Adding Fuel Injector control to the e-Manage
4. Adding Ignition Timing control to the e-Manage
5. Adding one accessory to the e-Manage
6. Datalogging from the e-Manage
and finally,
7. How I have been tuning my Supercharged MR2 with the e-Manage

#9
Projects and Build-Ups / Re: The Rebirth
March 13, 2016, 05:19:25 PM
It's been a while so here comes some much needed updates!!
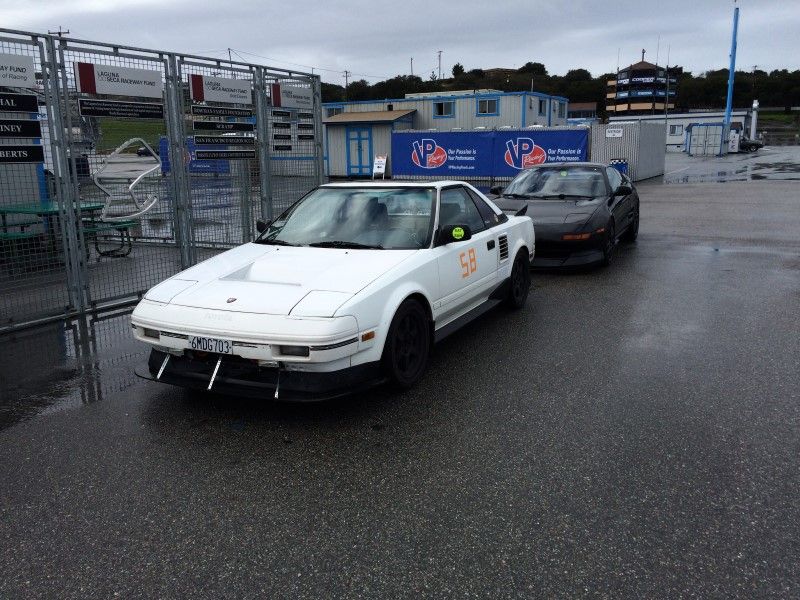
First, how about some teaser pics of what's to come?

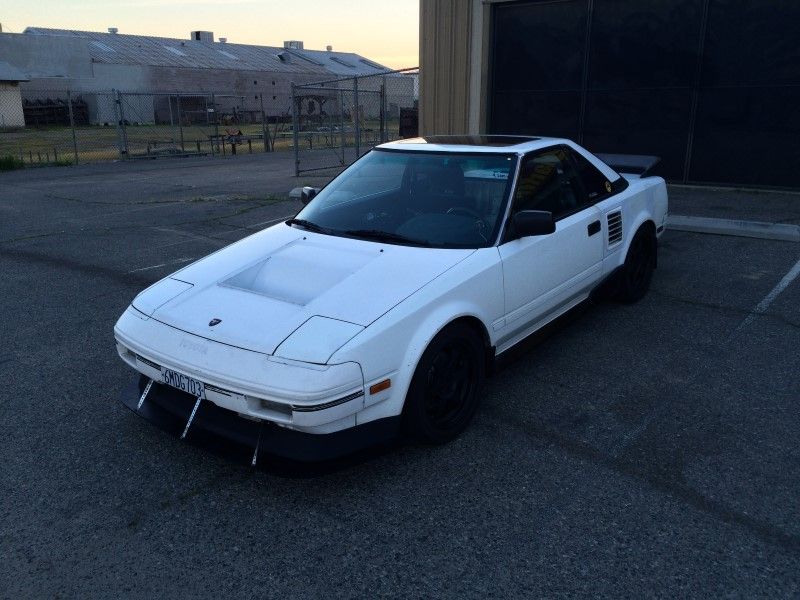
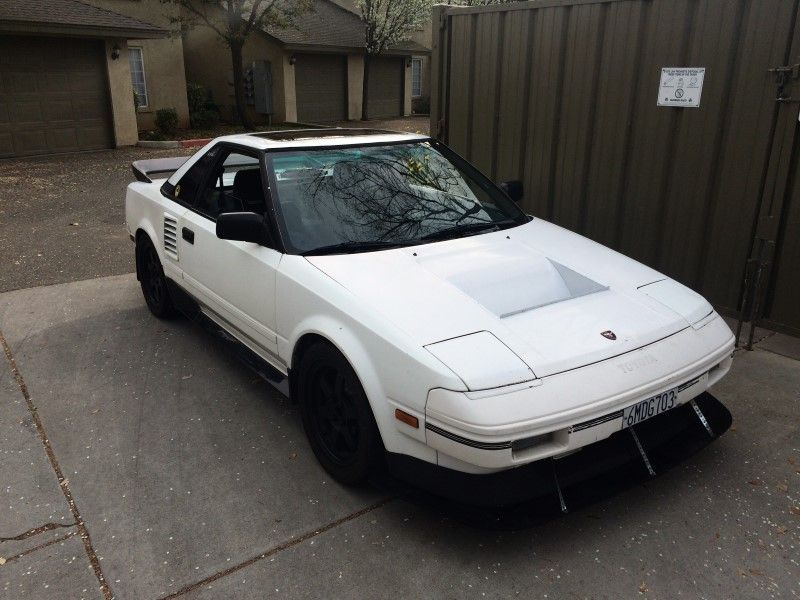
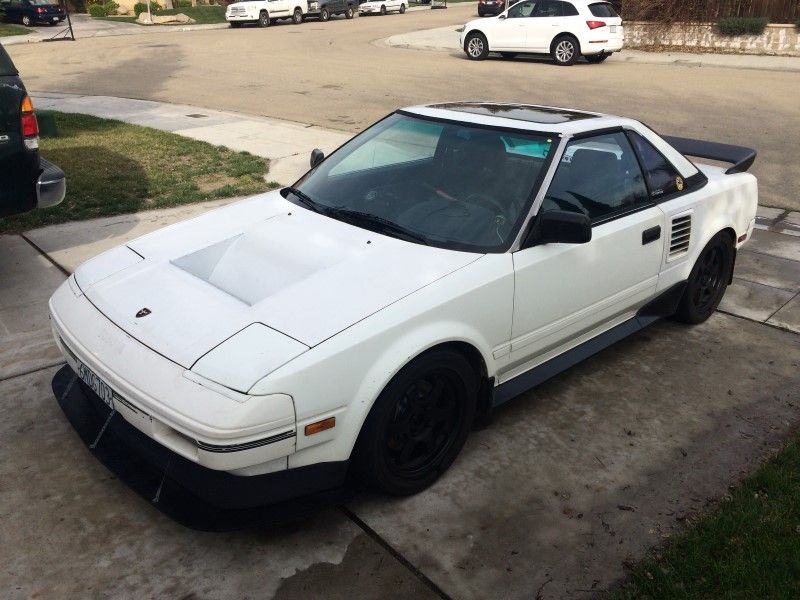
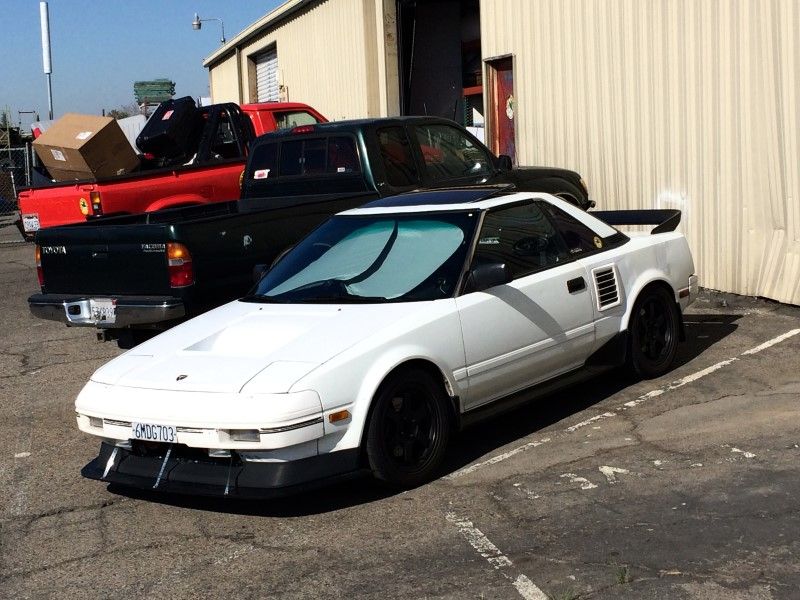
First, how about some teaser pics of what's to come?
#10
N00b Check-In / Re: Hello
March 09, 2016, 04:17:46 PM
Hey Colston,
Glad to hear your car is running better.......a year ago How is it doing since your last report?
Glad to hear your car is running better.......a year ago
How is it doing since your last report?
#11
Trips / Re: Time attacks
March 09, 2016, 04:08:47 PM
Just came across Colston's posts above.
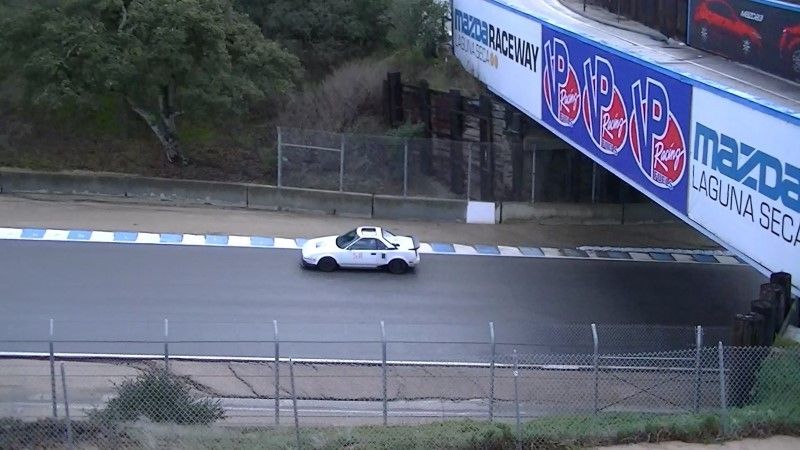
WOW those two routes look amazing, especially the second one! I would love to try this once it warms up some (less risk of snow/ice).
I am planning on doing like a YouTube video series of my favorite local foothill touge roads. Might get a chance to take some test footage this weekend
Regards,
BigMike
WOW those two routes look amazing, especially the second one!
I would love to try this once it warms up some (less risk of snow/ice).I am planning on doing like a YouTube video series of my favorite local foothill touge roads. Might get a chance to take some test footage this weekend
Regards,
BigMike
#12
Projects and Build-Ups / Re: The Rebirth
December 09, 2015, 10:22:27 PM
Sept 7, 2015: Finally, proper tuning.
The very next day was a milestone day for my car because this happened:

Muchhhh more to come!
The very next day was a milestone day for my car because this happened:
Muchhhh more to come!
#13
Projects and Build-Ups / Re: The Rebirth
December 09, 2015, 10:19:12 PM
Sept 6, 2015: A return to the WebCam world
After having the ability to Datalog Air/Fuel ratio, I was messing around a lot with my cam timing using stock gears that I had slotted. The slots provided cam advance for both cams to about 10-12 degrees each. I was messing around with them so much and comparing AFR that one day Bill reminded me how he still had my old set of WebCam grind 294s laying around. At this time I wasn't exactly looking for more power but I figured Why Not? H-U-G-E T-H-A-N-K- Y-O-U T-O B-I-L-L!!!!!!! I would be lost without this amazing friend and engine/performance mentor
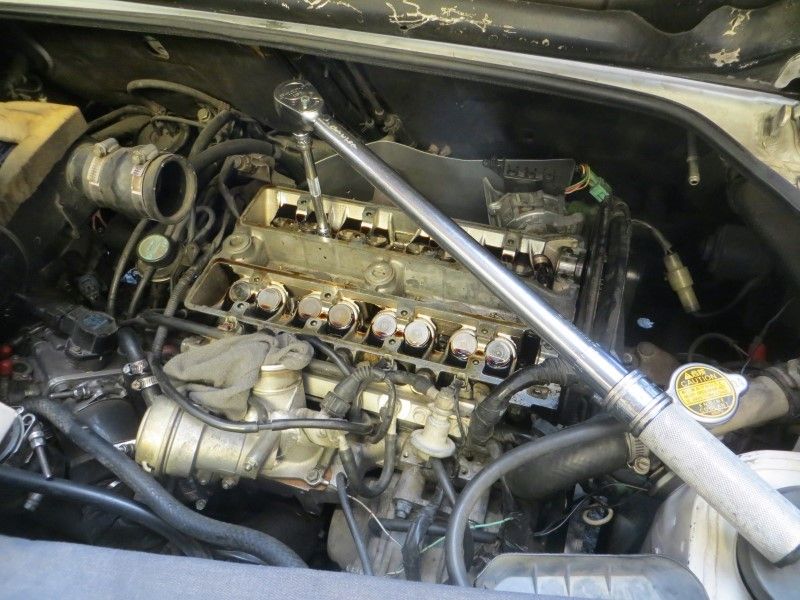
Removing stock GZE cams:
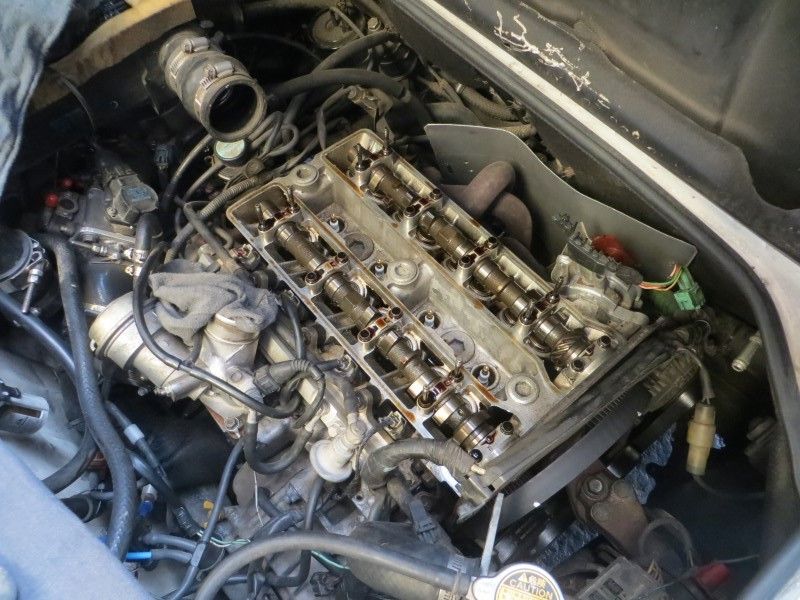
I then checked my cylinder head torque on the ARP studs. Spec is for 60 lb-ft and none moved save the last two at the end of the block. They took almost an eighth of a turn each to get back to 60. Glad I checked them.
Then the new cams went in. I was having such a good time that I forgot to take even ONE pic of the cams!! I did take before and after valve adjustment measurements:
Cylinder, Exhaust, Intake, in thousandths of an inch:
-- In Ex In
1a 09 11
1b 08 12
2a 08 11
2b 09 11
3a 08 10
3b 06 11
4a 06 11
4b 07 12
A few intakes are on the limit of being tight but they are intake so I wasn't so concerned.
And finally here are some nice shots of her all back together!
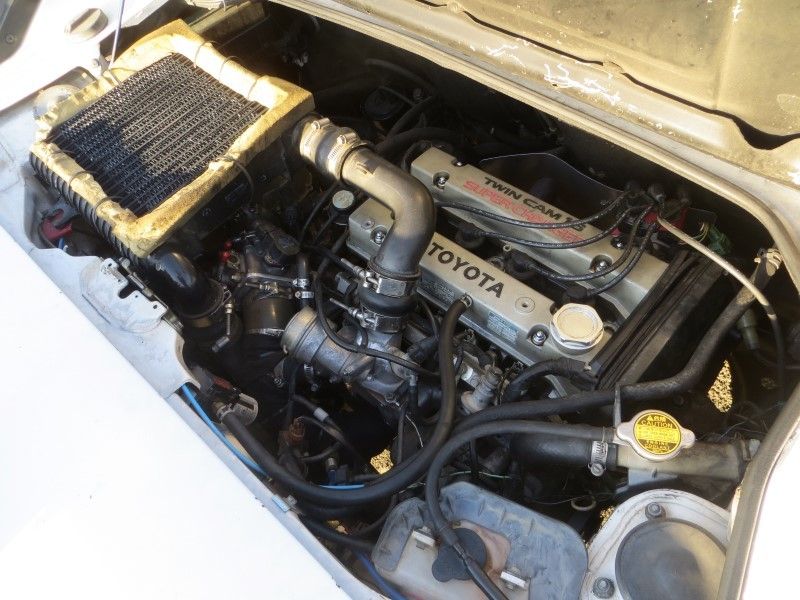
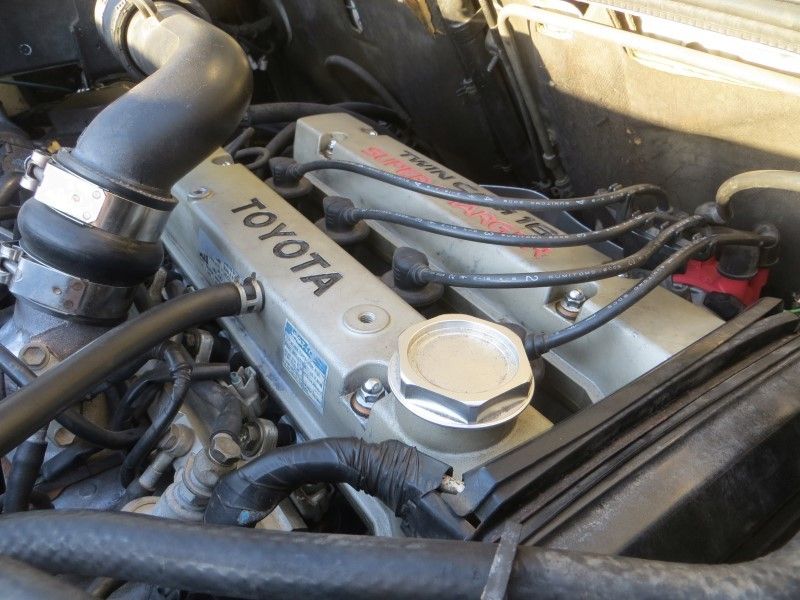
The Mighty 4A-GZE
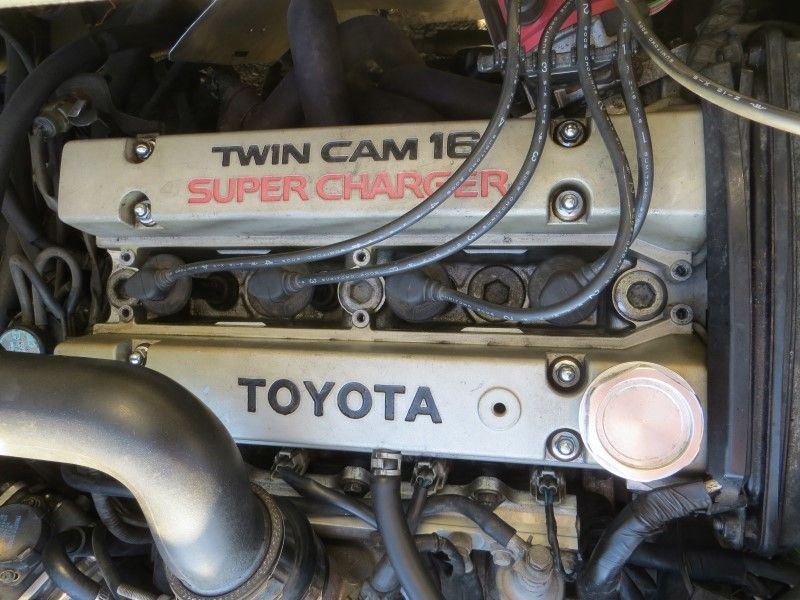
This is now my second time installing grind 294 cams into a 4A-GZE!
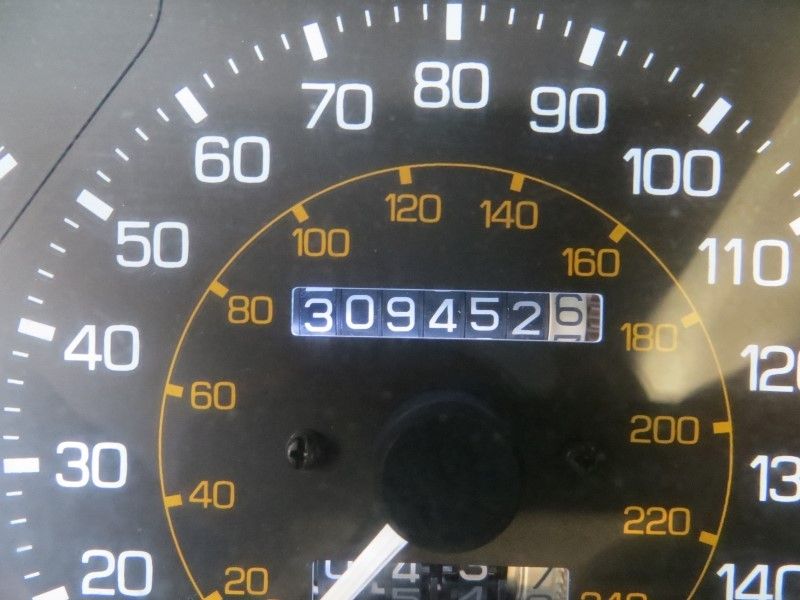
Bonus pic: Approaching 310k miles! :cool:
After having the ability to Datalog Air/Fuel ratio, I was messing around a lot with my cam timing using stock gears that I had slotted. The slots provided cam advance for both cams to about 10-12 degrees each. I was messing around with them so much and comparing AFR that one day Bill reminded me how he still had my old set of WebCam grind 294s laying around. At this time I wasn't exactly looking for more power but I figured Why Not? H-U-G-E T-H-A-N-K- Y-O-U T-O B-I-L-L!!!!!!!
I would be lost without this amazing friend and engine/performance mentor Removing stock GZE cams:
I then checked my cylinder head torque on the ARP studs. Spec is for 60 lb-ft and none moved save the last two at the end of the block. They took almost an eighth of a turn each to get back to 60. Glad I checked them.
Then the new cams went in. I was having such a good time that I forgot to take even ONE pic of the cams!!
I did take before and after valve adjustment measurements:Cylinder, Exhaust, Intake, in thousandths of an inch:
-- In Ex In
1a 09 11
1b 08 12
2a 08 11
2b 09 11
3a 08 10
3b 06 11
4a 06 11
4b 07 12
A few intakes are on the limit of being tight but they are intake so I wasn't so concerned.
And finally here are some nice shots of her all back together!
The Mighty 4A-GZE
This is now my second time installing grind 294 cams into a 4A-GZE!
Bonus pic: Approaching 310k miles! :cool:
#14
Projects and Build-Ups / Re: The Rebirth
December 02, 2015, 08:20:47 AM
Last night I found a nice Brake Bias Calculator and looked over some numbers...
Source: http://www.tceperformanceproducts.com/bias-calculator/ (using published data I've collected online, mm converted to inches)
So at Thunderhill I had 14.6% more rear brake bias than stock and for Laguna this increase will be cut by nearly 2/3rds. If I go with the SW20b rear caliper then I'll actually have more front balance than stock. Interesting...
In terms of just driving around out foothill/mtn roads, I've always preferred a rear brake bias. I'd rather have the rear lock up before the fronts. I hardly have any track experience but beings that one should get all her braking done before each corner, I guess all we'd care about is maximum braking performance in a straight line. Hmmmm.... just the things I think about throughout the day
Regards,
BigMike
Source: http://www.tceperformanceproducts.com/bias-calculator/ (using published data I've collected online, mm converted to inches)
| Stock | Front + Front | ST185 + AW11 | ST185 + SW20b r |
| Front | Rear | Front | Rear | Front | Rear | Front | Rear | |
| Caliper dia: | 2 | 1.437 | 2 | 2 | 2.24409 | 2 | 2.24409 | 1.69291 |
| Rotor dia: | 10.1575 | 10.3937 | 10.1575 | 10.1575 | 10.9449 | 10.1575 | 10.9449 | 10.1575 |
| Pad height: | 1.87 | 1.86 | 1.87 | 1.87 | 2.13 | 1.87 | 2.13 | 1.86 |
| % FRONT BIAS | 64.6% | 50.0% | 58.8% | 66.5% | ||||
| Difference: | -14.6% | -5.8% | +1.9% |
So at Thunderhill I had 14.6% more rear brake bias than stock and for Laguna this increase will be cut by nearly 2/3rds. If I go with the SW20b rear caliper then I'll actually have more front balance than stock. Interesting...
In terms of just driving around out foothill/mtn roads, I've always preferred a rear brake bias. I'd rather have the rear lock up before the fronts. I hardly have any track experience but beings that one should get all her braking done before each corner, I guess all we'd care about is maximum braking performance in a straight line. Hmmmm.... just the things I think about throughout the day
Regards,
BigMike
#15
Projects and Build-Ups / Re: The Rebirth
December 01, 2015, 11:15:14 PM
258mm vs 278mm Comparison!
As mentioned above this made a HUGE improvement to my brake system. I can't wait to test em out on the track!
Here is a break down of my brake system:
Booster: 1988-89 Supercharged Dual-Diaphragm type
Master Cylinder: 1989-1995.5 1" Hilux (product link from Marlin Crawler)
Front Caliper: ST185 Celica, 57 mm piston
Front Rotor: ST185 Celica 278mm diameter, sourced through Marlin Crawler
Front Pads: Porterfield R4-S Street/Autocross (product link from TwoRUs)
Rear Caliper: 1987-89 AW11b MR2 front, 50.8 mm piston
Rear Rotor: 1987-89 AW11b MR2 front, vented, 258 mm diameter, sourced through Marlin Crawler
Rear Pads: Porterfield R4-S Street/Autocross front pads (product link from TwoRUs)
There is another option here and that would be to use a SW20b rear caliper. It has a piston bore diameter of 43mm which would bring the front-to-rear brake bias ratio of only 9.3% different than stock. So if I somehow manage to warp another set of rear rotors at Laguna, then I'll be switching the SW20b rear calipers. I'll still use AW11b front rotors in the rear.
And that's it for the front brake swap!