Main Menu
Menu

Show posts

This section allows you to view all posts made by this member. Note that you can only see posts made in areas you currently have access to.

Show posts Menu

Topics - BigMike

#1
Let's do it!! / Now Open To The Public!
October 08, 2014, 12:29:01 PM
Okay guys!

It's pretty much clear that this project is dead, so we've decided to open up this never-before-seen "Top Secret" 24 Hours of LeMons board and all it's sub-boards to the public.

Now guests can view any and all 24 hrs of LeMons threads and regular members can start new topics or reply to existing ones.

The heart of the project discussion can be found in this 23+ page thread: http://bigmike.marlincrawler.com/forum/index.php?topic=35

Also, the Team Theme was discussed under the "Story Ideas" forum in this thread: http://bigmike.marlincrawler.com/forum/index.php?topic=71 Little Duece Poupé

The project was a lot of fun while it lasted, and with all our neat ideas, it would be fun someday to revive this :yesnod:

Until then, we hope visitors can find something useful from our plans or at least have a good laughs at what we were working on :thumbs:

Regards,
BigMike

edit: added some more info
#2
Hey Bill,

I was doing some research on cams for my GZE and came across this. Have you heard about this? http://www.nonstoptuning.com/pageTriFlowDynos.html

They are taking a dual intake valve camshaft and having one lobe with a lower lift & I believe a staggered duration such that 1) velocities will be higher at both minimum valve angle and also maximum valve angle (so you get better bottom end and top end pwr), and 2) they are inducing a swirl to help with combustion (better MPG, lower emissions, smoother running).

Here is the page from ColtCams, who NST apparently co-developed the cams with: http://www.coltcams.com/html/tri_flow_technology/, and also a price sheet from NST: http://www.nonstoptuning.com/pNSTtriflowCams.html GOOD LORD THEY ARE EXPENSIVE. $800 for a pair of cams, and only the intake has the staggered design.

In other news, I discovered that my GZE does in fact NOT have large port cams. Take a look: http://www.mr2oc.com/showthread.php?t=468414 also posted at reply #71 of my build thread here.

CamLiftDuration    Intake opens    Exhaust opens   

4A-GZE cams, AW11/AE92   
7.10mm    232°8° BTDC47° BBDC

4A-GE cams, AE86 & AW11
7.56mm240°9° BTDC51° BBDC

WebCam grind # 294
8.20mm244°

So I think I am gonna swap out only my intake cam for a 4A-GE 7.56mm cam. What do ya think? Should I swap in both GE cams?
#3
Thank you Bill for telling me about this one. I'm skimmed it. Gonna give it a thorough reading soon  :working:

"The MR2 is a source of pure, unalloyed driving fun and is infinitely superior to anything remotely like it. God help the Italians if the Japanese ever decide to build supercars."


#4
Bill's Ricer Lighting / DIY Rear LED Tail Lights
December 29, 2013, 12:18:12 PM
Check it out, http://zilvia.net/f/off-topic-chat/300761-diy-led-tail-lights.html

I've seen a full brake lens LED conversion on a AW11 before. I'd love to do this someday to my MK1
#5
Take a look at this, apparently blue forward-facing lights are legal in Japan.

I only got this one picture while I was there, but there were many vehicles driving around with these blue lights turned on:
#6
General Automotive Talk / Parts from Japan
November 25, 2013, 04:38:29 PM
I'm off to the land of the rising sun next month, let me know if there is anything specific and easy for me to get and I'll see what I can come up with :D

Here is a start, Japan's largest online auction site for "4A-GE": http://auctions.search.yahoo.co.jp/search?p=4A-GE&auccat=&aq=-1&oq=&ei=UTF-8&slider=0&tab_ex=commerce

:driving:
#7
General Automotive Talk / Wrecked AW11
November 24, 2013, 10:23:46 AM
I was searching online wrecking yard inventories when I came across this '88. Yikes :o Holy buckles Batman!
#8
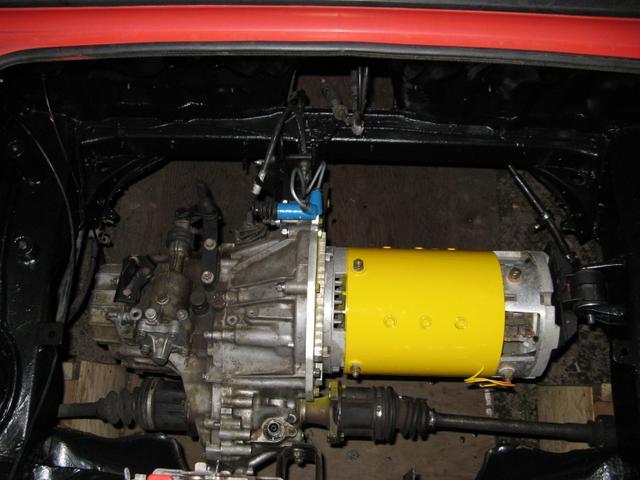
Engine Theory / Check out this EV AW11
February 11, 2013, 04:05:26 PM
Linky: http://www.amphibike.org/index.cgi?page=pages/3_wheels/mr2

Lots of info and good reading


BigMike
#9
Track / Redline Time Attack Annual Track Events
January 03, 2013, 09:02:29 AM
Bill shared this with me and I am highly interested!

https://www.redlinetimeattack.com

I haven't read all the info yet, but it looks to be a weekend event, about $150 each day (Sat and/or Sun), and you simply show up with your car and do some hot laps on different tracks throughout California.


This sounds pretty good to me since 1) I already have a car that runs and 2) I've always wanted to get my car to a track :hyper:

Here is some quick info

Categories:
  • Unlimited AWD
  • Unlimited RWD (FR,MR,RR)
  • Unlimited FF
  • Limited AWD
  • Limited RWD (FR,MR,RR)
  • Limited FF
  • Street AWD
  • Street RWD (FR,MR,RR)
  • Street FF

Tracks and Schedule:
  • Round 1: REGISTRATION OPEN February 16/17 - Buttonwillow Raceway (near Bakersfield, CA)
  • Round 2: March 16/17 - Willow Springs International Raceway (near Lancaster, CA)
  • Round 3: May 4/5 - Chuckwalla Valley Raceway (near Desert Center, CA)
  • Round 4: June 15/16 - Willow Springs International Raceway
  • Round 5: July  20/21-  ButtonWillow Raceway #2
  • Round 6: September 14/15 - Auto Club Speedway Sports Car Roval Course (near Fontana, CA)
  • Round 7: October 12/13 - Willow Springs International Raceway #2
  • Round 8: November 23/24 - Auto Club Speedway Sports Car Roval Course #2

Registration Prices:
  • Unlimited Class – $300 per entry
  • Limited Class – $300 per entry
  • Street Class – $150 per entry

I know Bill would like to join me, Mike, how about you and your new MR2? First event is Feb 16-17 :driving:
#11
Let's do it!! / Car's VIN #
September 10, 2012, 07:23:10 AM
Hey Bill,

I need to get some parts for my engine from Toyota and I need the VIN from the Poupe. Please post it up, thanks!! :beerchug:
#12
Let's do it!! / Official Team Budget
September 06, 2012, 01:53:38 PM
Here is the Official Team Budget. This will be edited as needed.

ItemEstimated Price

4A Piston Rings
~$28 (confirmed)

Late model (higher compression) 4A Pistons
~$65 (confirmed)

Porsche 924 Timing Belt

Calica GT Front Brake Calipers     
$40?

Cage Kit Built
$300-$400 (estimated by BigMike, no official quote yet)

Cage Kit Install Labor
$400-$800 (estimated by BigMike, no official quote yet)

Core C60 Transaxle
$400?


Last updated 9/6/2012
#13
Let's do it!! / Status #2
September 03, 2012, 03:55:21 PM
We had a good meeting last Wednesday evening :thumbs: Bill (Sirdeuce), Mike (MiniMike), Chris (3.slow) and myself were in attendance. Bill's wife Barbra was also there

We discussed where the project is at and what we need to do to get the car running as soon as possible. Here is what we came up with:

1) Get the cage built and installed. I have contracted our fabricator Rocky for this job and he is coming up with a quote for us now.
2) While Rocky is installing the cage, Bill will build the engine.
3) While Bill is building the engine, I will build the 6-speed transaxle.

Notes:
Cage: We want to get the cage built now and then install the interior around it. I believe the original plan was to get the car up and running and later install the cage, but Bill suggested installing it first to help with mounting and wiring everything and we unanimously agreed.
Engine: We agreed to go with the larger 1.8-liter displacement 7A block for better torque. Bill needs rings before he can start and I am looking in to getting these. The 7A crank has a different bolt count than the 4A crank, so we won't be able to use our lightweight flywheel. We will have to come up with some extra $ to get a lightweight 7A flywheel, if one exists, or to lighten the stock part.
Transaxle: We already have a C50 donor core to build into a 6-speed, but we need to get a C60 6-speed. I will look into this also.

As for the car, it approximately looks how it did from July of last year:


The California LeMons races are held once every season: ~ March at Infineon Raceway (north of S.F. near Sonoma), June at Buttonwillow Raceway (near Bakersfield), September at Thunderhill Raceway (above Sacramento), and in December usually somewhere near the LA area.

Remember that the application deadlines are a few months in advance of each race, so we'll miss the remaining Sept and Dec events for this year but have a GREAT chance to apply for the March event whose deadline is in mid January.

So that's it: We need to get the car running and fully tested, everyone with some seat time, and our team theme and application all finalized by January. This gives us four full months :_order: and we can hit all four events next year!! :woohoo:

LET'S DO THIS!!! :hyper:
#14
Roll Cage & Safety / AW11 Cage Examples
August 30, 2012, 04:50:58 PM
I took these pictures when Bill, Bevin and myself went to the 2010 Arse-Freeze-Apalooza from two different AW11s that were on hand.

I just printed these pictures out and gave them to Rocky. He is going to look it over and get back to me with a quote.

Section 3.1 of the LeMons rule book states,
QuoteMinimum tubing size for cars weighing under 3000 pounds as raced is 1.50" x .120" or 1.75" x .095"

So we can use 1-1/2" diameter or a thinner walled 1-3/4" diameter tubing. Also,
QuoteDOM mild steel is very strongly recommended over ERW (seamed) tubing.

Seamed tubing is cheaper and for the same steel grade it is weaker, however I told Rocky we don't mind which way we go. He suggested using the DOM for the main hoops and the rest we'd use seamed tubing. This is a good idea that offer better protection at a reduced price.

Please bare in mind that this may cost us an easy grand to have him 1) build the cage and 2) install the cage....

He is going to get back to me with a quote.
#15
Hey guys,

I am calling a Project Revival Meeting this Wednesday night at 6:30pm at the Denny's on the South-East corner of Shaw & Willow.

We are going to discuss plans to get the car ready!! Please plan to make it!!

Google Map to this Denny's: http://goo.gl/maps/EihPp

Thanks
Mike
#16
Click here for more info: https://www.facebook.com/events/508233839193866/

I am a Facebook member of the Nissan Club of Fresno (NCOF) and they are having their 2nd annual Mountain Run this Saturday.

I'd LOVE to go but I'll be up on the Dusy/Ershim tail instead.

Here are some videos. All cars are welcomed as you can see!
https://www.facebook.com/events/508233839193866/permalink/508241819193068/
https://www.facebook.com/events/508233839193866/permalink/513203065363610/

Video from last year's event:
https://www.facebook.com/events/508233839193866/permalink/518260098191240/

And here is a Map of their planned route: http://goo.gl/maps/Bc2QD

They are meeting in River Park at 2pm this Saturday afternoon and heading up Auberry Rd to Prather, then again on Auberry Rd through and up above Auberry city to the top of the 4 lanes, and then down Old Tollhouse where they will stop and have a BBQ afternoon dinner in Tollhouse.

Bill, you should do this!! Just go to Prather and wait for the convoy to arrive!!! :order:
#17
Chit Chat / Testing something on the forum
August 17, 2012, 10:57:25 AM
test
#18
Suspension Theory / Simple DIY Extra Camber
December 10, 2011, 07:04:58 PM
Hey guys,

This is a really basic concept and it's something I've wanted to do for a lonnng time, so here goes-

I got my '87 aligned earlier this summer and told them to go max negative camber in the front and -1.5 degrees in the rear. Here is what they were able to get:

Driver's front: -1.3 degrees
Passenger's f: -1.4

Driver's rear: -1.5
Passenger's r: -1.5

They were able to match my specs for the rear, but having more rear camber in a car that already has too much rear traction isn't going to help the understeer. So I did some research with crash bolts, ordered some on eBay, and I wasn't happy with how small a diameter they were; I just didn't trust them.

I am running 195x60x14 rubbers, Suspension Technique springs, Tokico Illuminas struts, front S.T. sway bar (on the lightest setting), and a stock rear 1985 sway bar. I like the combination so much and this is my daily driver, so I've never wanted to switch to coil overs + camber plates.

So here is what I did to get more front negative camber on the factory strut assemblies:

I first got a base-line measurement using a digital degree finder. The driver's front (left pic) measured 88.5 degrees above the horizon and the passenger's measured 88.3 degrees (right pic):


I lifted the car up and removed the strut assembly from the top. I had to first check if there was much room between the inside of the spring assembly and the body and thankfully there was plenty of room in there. This is a critical component for what I was about to do and luckily I was able to move the assembly all over the place:


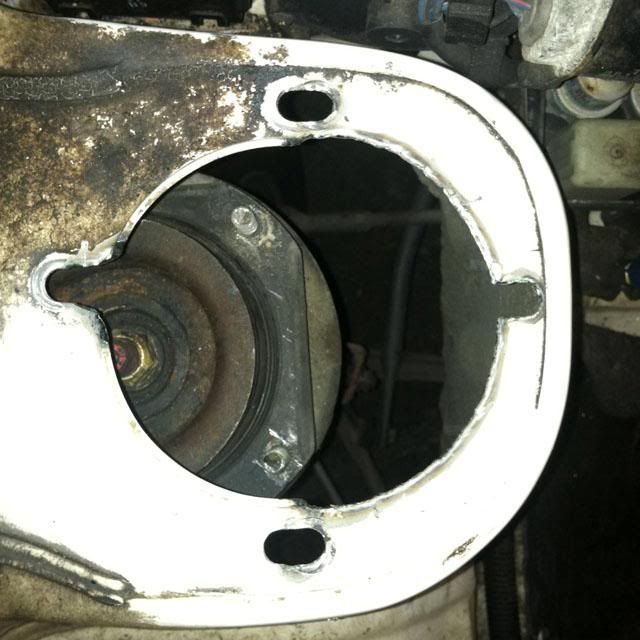
I then slotted the holes as shown below. (I used a plasma cutter which made this really easy to do)

Here is the driver's side slotted:


Here is the passenger's side slotted:


I wanted to get as much in-bound adjustment as possible, so I slotted the inner-most bolt hole as far as I could until the strut assembly interfered with the body. This happened to be right at the body line as shown below. So all you have to do is slot the inner most hole up to this body line, and then match the amount of slotting to the other holes and you're done:


Here is the car lowered back onto the driver's side strut assembly. You can see the amount of slotting done. Also, you'll have to elongate the raised lip so the assembly can move inwards along with the studs. It was a series of lifting the car up, trimming, setting it down, repeat until no parts interfered:


And finally, here is the assembly bolted down with the factory strut brace also slotted and trimmed to match. I used a Dremel to clean all sharp edges from the cuts and spray painted to safeguard against rust. It is difficult to see in this pic, but I used some wide and thick washers to help spread the load from the nut across the slots:


Here are the final measurements with the car back on the ground. According to my degree finder, I picked up exactly an additional 1.1-degrees of negative camber on each side:


(Yes I realize the car had been lifted numerous times, and the wheel position may have changed, and that this may not relate to the same amount of actual suspension camber since my toe got completely thrown off... But this must be an improvement since I am in-boarding the assemblies as if I had camber plates.)

The next morning I took the car to the alignment shop and told them to only realign the front and to set the camber to -2.5 degrees on each side. They told me that is way out of spec and the car can't achieve that, so I told them to humor me & to please adjust it to -2.5 degrees or as much as possible. Here are the final results!!

Driver's front: -2.5 degrees
Passenger's f: -2.5

WOOHOOO!! FINALLY I have some awesome front camber!! And let me tell ya!! WHAT A DIFFERENCE THIS HAS MADE!! HOLY CRAP! I can't believe the difference! The turn-in of the car has drastically improved! So much so that I can control oversteer with the steering wheel instead of relying on the throttle, something I could NEVER do before with its strong tendency to understeer. Also, when the car begins to understeer, the tires make a much deeper squeal than compared to before. I believe this indicates there is more rubber contacting the ground.

Moreover, everything I'm experiencing will only get better and better as the tires wear into the new cambered position.

Honestly I can't express in words how much of a difference this has made for my car and my driving style. If you're like me and have a ridiculous amount of seat time in your MR2, then you owe it to yourself to do this and experience the difference first-hand. This has completely transformed my MR2, a car that I've owned and driven since 1999.

In my opinion & based on how I drive, I now have enough front traction to necessitate a rear sway bar upgrade -- not as the typical "band-aid" to hide the car's understeer, but rather to take advantage of the new & improved turn-in. At corner entrance the car now responds as if the center of mass has moved forward.

If you've been thinking about doing this -- stop thinking and get it done. I should have done this years ago. Because of the trial-and-error nature, it took about 3 hrs from start to finish. I'm sure this can be done in less than 1 hr with the right equipment. The only cost was to get the car re-aligned. I plan on building some roll center blocks for the front, so when I get it aligned again, I'll have the shop check the maximum camber just for kicks. I'm betting its around 3 degrees which is unheard-of with stock parts.

So far it's been 2 weeks after doing this and nothing has moved at all. I've got 4 bolts up there for-crying-out-loud -- I highly doubt they will move. But if they do move (through the slotted holes), all I have to do is take some washers and cut out little half-moon inserts to fit snugly between each stud and original bolt hole body line. Then it will be physically impossible for it to move.

Now I REALLY can't wait to go autocrossing next season!!

Regards,
BigMik
#19
Check this out, this is awesome

http://frsedan.com/2010/07/30/too-many-pictures-stuff-to-look-at/

Post up links to your favorite ones!


Here is my favorite, a TE27 Mango!
#20
Hey guys check this out: http://www.mr2.com/forums/mk-1-mr2-aw11/Toyota-MR2-67269-88-4agze-engine-sale.html

I sent him a PM a while ago and the guy *finally* replied to me with the following:

QuoteI apologize for the delay! busy with new job and  my new toy, my girlfriend would like $350 for the block s/c and intercooler, only thing wrong aside from aneeding assembly is exhaust valve 3 burned,. To the best of my knowledge. My phone number is 253-653-4388 if you still need it! Thanks

I know it's up in Washington, but I have plenty of friends up there who can pick it up for us. Then we could claim we got the engine for $200, since it has a burnt valve and seems to be in pieces from the sound of it.

Then we could have a GZE setup for our car.

I need to let the guy know soon because I think he has other ppl interested in it. I've got the money to buy it. I was thinking about offering him $300 cash picked up so he doesn't have to waste his time & money shipping it.

Thoughts? Suggestions?

Mike